


Android百度地图自定义公交路线导航_Android
2016-02-18 13:31:18
[小 大]
已经帮助:人解决问题
一、问题描述
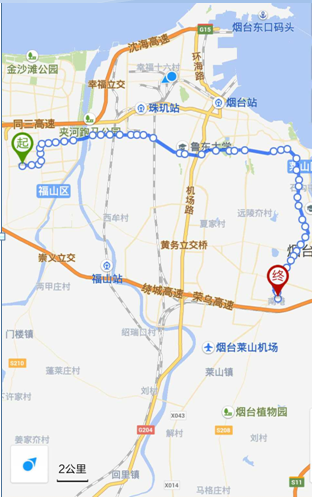
基于百度地图实现检索指定城市指定公交的交通路线图,效果如图所示
二、通用组件Application类,主要创建并初始化BMapManager
public class App extends Application {static App mDemoApp;//百度MapAPI的管理类public BMapManager mBMapMan = null;// 授权Key// 申请地址:http://dev.baidu.com/wiki/static/imap/key/public String mStrKey = "Your APPKey";boolean m_bKeyRight = true; // 授权Key正确,验证通过// 常用事件监听,用来处理通常的网络错误,授权验证错误等public static class MyGeneralListener implements MKGeneralListener {@Overridepublic void onGetNetworkState(int iError) {Log.d("MyGeneralListener", "onGetNetworkState error is "+ iError);Toast.makeText(App.mDemoApp.getApplicationContext(), "您的网络出错啦!",Toast.LENGTH_LONG).show();}@Overridepublic void onGetPermissionState(int iError) {Log.d("MyGeneralListener", "onGetPermissionState error is "+ iError);if (iError == MKEvent.ERROR_PERMISSION_DENIED) {// 授权Key错误:Toast.makeText(App.mDemoApp.getApplicationContext(), "文件输入正确的授权Key!",Toast.LENGTH_LONG).show();App.mDemoApp.m_bKeyRight = false;}}}@Overridepublic void onCreate() {Log.v("BMapApiDemoApp", "onCreate");mDemoApp = this;mBMapMan = new BMapManager(this);mBMapMan.init(this.mStrKey, new MyGeneralListener());mBMapMan.getLocationManager().setNotifyInternal(10, 5);super.onCreate();}@Override//app的退出之前调用mapadpi的destroy()函数,避免重复初始化带来的时间消耗public void onTerminate() {if (mBMapMan != null) {mBMapMan.destroy();mBMapMan = null;}super.onTerminate();}} 三、编写公交的路线图层(CustomRouteOverLay)和图标标识(CustomOverlayItem)
CustomRouteOverLay组件扩展RouteOverlay:
主要公交、步行和驾车线路图层,将公交、步行和驾车出行方案的路线及关键点显示在地图上,根据车辆路线的起点和终点进行驾车路线的检索;
CustomOverlayItem扩展ItemizedOverlay<OverlayItem>:
覆盖物的集合类,使用这个类可以将地图上具有相同属性或者特性的坐标使用图标标识出来,OverLayItem 这个类对象则是ItemizedOverLay中一个一个的Item对象 也就是每个坐标对应的覆盖物
CustomRouteOverLay类代码:
public class CustomRouteOverLay extends RouteOverlay {public Activity ac;private MapView mapView;static ArrayList<View> overlayviews = new ArrayList<View>();public CustomRouteOverLay(Activity arg0, MapView arg1) {super(arg0, arg1);ac = arg0;mapView = arg1;// TODO Auto-generated constructor stub}@Overrideprotected boolean onTap(int arg0) {// TODO Auto-generated method stub// return super.onTap(arg0);return true;}@Overridepublic void setData(MKRoute arg0) {// TODO Auto-generated method stubsuper.setData(arg0);addHint(arg0);}public void addHints(MKRoute routes) {for (int i = 0; i < routes.getNumSteps(); i++) {Drawable marker = ac.getResources().getDrawable(R.drawable.pop); // 得到需要标在地图上的资源marker.setBounds(0, 0, marker.getIntrinsicWidth(),marker.getIntrinsicHeight()); // 为maker定义位置和边界OverItemT overitem = new OverItemT(marker,ac, routes.getStep(i).getContent(),routes.getStep(i).getPoint());// OverlayItem over=new OverlayItem(routes.GET, null, null);mapView.getOverlays().add(overitem); // 添加ItemizedOverlay实例到mMapView}mapView.invalidate();}/*** 增加 指示路线* @param routes*/public void addHint(MKRoute routes) {mapView.getOverlays().clear();// 先清空// mapView.removeAllViewsInLayout();View mPopView = ac.getLayoutInflater().inflate(R.layout.popview,null);for(int i=0;i< overlayviews.size();i++){System.out.println("remove &"+i);mapView.removeViewInLayout(overlayviews.get(i));overlayviews.remove(i);}mapView.invalidate();// 添加ItemizedOverlayfor (int i = 0; i < routes.getNumSteps(); i++) {Drawable marker = ac.getResources().getDrawable(R.drawable.pop); // 得到需要标在地图上的资源marker.setBounds(0, 0, marker.getIntrinsicWidth(),marker.getIntrinsicHeight()); // 为maker定义位置和边界GeoPoint pt = routes.getStep(i).getPoint();// =// routes.get(i).getPoint();if (i != 0 && i != routes.getNumSteps() - 1) {mPopView = ac.getLayoutInflater().inflate(R.layout.popview,null);mapView.addView(mPopView, new MapView.LayoutParams(LayoutParams.WRAP_CONTENT, LayoutParams.WRAP_CONTENT, null,MapView.LayoutParams.TOP_LEFT));mPopView.setVisibility(View.GONE);mapView.updateViewLayout(mPopView, new MapView.LayoutParams(LayoutParams.WRAP_CONTENT, LayoutParams.WRAP_CONTENT, pt,MapView.LayoutParams.BOTTOM_CENTER));mPopView.setVisibility(View.VISIBLE);Button button = (Button) mPopView.findViewById(R.id.overlay_pop);button.setText(routes.getStep(i).getContent());overlayviews.add(mPopView);overlayviews.add(button);} else {//修改起始点和终点样式-自定义mPopView = ac.getLayoutInflater().inflate(R.layout.popview,null);mapView.addView(mPopView, new MapView.LayoutParams(LayoutParams.WRAP_CONTENT, LayoutParams.WRAP_CONTENT, null,MapView.LayoutParams.TOP_LEFT));mPopView.setVisibility(View.GONE);mapView.updateViewLayout(mPopView, new MapView.LayoutParams(LayoutParams.WRAP_CONTENT, LayoutParams.WRAP_CONTENT, pt,MapView.LayoutParams.BOTTOM_CENTER));mPopView.setVisibility(View.VISIBLE);Button button = (Button) mPopView.findViewById(R.id.overlay_pop);button.offsetTopAndBottom(100);button.setTextColor(Color.BLUE);button.setBackgroundColor(Color.TRANSPARENT);button.setText(routes.getStep(i).getContent());overlayviews.add(mPopView);overlayviews.add(button);}}}class OverItemT extends ItemizedOverlay<OverlayItem> {private Drawable marker;private Context mContext;private GeoPoint p;private OverlayItem o;public OverItemT(Drawable marker, Context context, String title,GeoPoint p) {super(boundCenterBottom(marker));this.marker = marker;this.mContext = context;this.p = p;// 构造OverlayItem的三个参数依次为:item的位置,标题文本,文字片段o = new OverlayItem(p, title, title);populate(); // createItem(int)方法构造item。一旦有了数据,在调用其它方法前,首先调用这个方法}public void updateOverlay() {populate();}@Overridepublic void draw(Canvas canvas, MapView mapView, boolean shadow) {// Projection接口用于屏幕像素坐标和经纬度坐标之间的变换Projection projection = mapView.getProjection();for (int index = size() - 1; index >= 0; index--) { // 遍历mGeoListOverlayItem overLayItem = getItem(index); // 得到给定索引的itemString title = overLayItem.getTitle();// 把经纬度变换到相对于MapView左上角的屏幕像素坐标Point point = projection.toPixels(overLayItem.getPoint(), null);// 可在此处添加您的绘制代码Paint paintText = new Paint();paintText.setColor(Color.BLUE);paintText.setTextSize(15);canvas.drawText(title, point.x - 30, point.y, paintText); // 绘制文本}super.draw(canvas, mapView, shadow);// 调整一个drawable边界,使得(0,0)是这个drawable底部最后一行中心的一个像素boundCenterBottom(marker);}@Overrideprotected OverlayItem createItem(int i) {// TODO Auto-generated method stubreturn o;}@Overridepublic int size() {// TODO Auto-generated method stubreturn 1;}@Override// 处理当点击事件protected boolean onTap(int i) {// 更新气泡位置,并使之显示return true;}@Overridepublic boolean onTap(GeoPoint arg0, MapView arg1) {// TODO Auto-generated method stub// 消去弹出的气泡// ItemizedOverlayDemo.mPopView.setVisibility(View.GONE);return super.onTap(arg0, arg1);}}}CustomOverlayItem代码:
public class CustomOverlayItem extends ItemizedOverlay<OverlayItem> {// private List<OverlayItem> GeoList = new ArrayList<OverlayItem>();private Context mContext;private OverlayItem overlay;boolean showtext;// private String title;private Drawable marker;public CustomOverlayItem(Drawable marker, Context context, GeoPoint p,String title,String sinppet, boolean showtext) {super(boundCenterBottom(marker));this.mContext = context;// 用给定的经纬度构造GeoPoint,单位是微度 (度 * 1E6)// point = p;this.showtext = showtext;// this.title = title;this.marker = marker;overlay = new OverlayItem(p, title, sinppet);populate(); // createItem(int)方法构造item。一旦有了数据,在调用其它方法前,首先调用这个方法}@Overrideprotected OverlayItem createItem(int i) {return overlay;}@Overridepublic int size() {return 1;}@Overridepublic void draw(Canvas canvas, MapView mapView, boolean arg2) {// TODO Auto-generated method stubsuper.draw(canvas, mapView, arg2);// Projection接口用于屏幕像素坐标和经纬度坐标之间的变换Projection projection = mapView.getProjection();String title = overlay.getTitle();// 把经纬度变换到相对于MapView左上角的屏幕像素坐标Point point = projection.toPixels(overlay.getPoint(), null);// 可在此处添加您的绘制代码Paint paintText = new Paint();Paint paint = new Paint();paint.setAlpha(255);paint.setColor(Color.DKGRAY);paint.setStrokeWidth(5);paintText.setColor(Color.BLUE);paintText.setTextSize(15);// canvas.drawCircle(point.x, point.y, 100, paint);canvas.drawText(title, point.x-30, point.y-50, paintText); // 绘制文本// 调整一个drawable边界,使得(0,0)是这个drawable底部最后一行中心的一个像素boundCenterBottom(marker);}@Override// 处理当点击事件protected boolean onTap(int i) {if (showtext)Toast.makeText(this.mContext, overlay.getTitle(), Toast.LENGTH_SHORT).show();return true;}}四、编写主程序BuslineSearch,扩展MapActivity,实现地图信息的显示
public class BuslineSearch extends MapActivity {Button mBtnSearch = null; // 搜索按钮MapView mMapView = null; // 地图ViewMKSearch mSearch = null; // 搜索模块,也可去掉地图模块独立使用String mCityName = null;LocationListener loc_listener;App app = null;static boolean flag = false;static Thread thread;protected void onCreate(Bundle savedInstanceState) {super.onCreate(savedInstanceState);setContentView(R.layout.buslinesearch);app = (App) this.getApplication();if (app.mBMapMan == null) {app.mBMapMan = new BMapManager(getApplication());app.mBMapMan.init(app.mStrKey, new App.MyGeneralListener());}app.mBMapMan.start();// 如果使用地图SDK,请初始化地图Activitysuper.initMapActivity(app.mBMapMan);mMapView = (MapView) findViewById(R.id.bmapView);mMapView.setBuiltInZoomControls(true);// 设置在缩放动画过程中也显示overlay,默认为不绘制mMapView.setDrawOverlayWhenZooming(true);mMapView.setBuiltInZoomControls(true);// 初始化搜索模块,注册事件监听MapController mMapController = mMapView.getController(); // 得到mMapView的控制权,可以用它控制和驱动平移和缩放GeoPoint point = new GeoPoint((int) (39.915 * 1E6),(int) (116.404 * 1E6)); // 用给定的经纬度构造一个GeoPoint,单位是微度 (度 * 1E6)mMapController.setCenter(point); // 设置地图中心点mMapController.setZoom(15); // 设置地图zoom级别mSearch = new MKSearch();mSearch.init(app.mBMapMan, new MKSearchListener() {public void onGetPoiResult(MKPoiResult res, int type, int error) {// 错误号可参考MKEvent中的定义if (error != 0 || res == null) {Toast.makeText(BuslineSearch.this, "抱歉,未找到结果",Toast.LENGTH_LONG).show();return;}// System.out.println(res.toString());// 找到公交路线poi nodeMKPoiInfo curPoi = null;int totalPoiNum = res.getNumPois();for (int idx = 0; idx < totalPoiNum; idx++) {Log.d("busline", "the busline is " + idx);curPoi = res.getPoi(idx);if (2 == curPoi.ePoiType) {break;}}mSearch.busLineSearch(mCityName, curPoi.uid);}public void onGetDrivingRouteResult(MKDrivingRouteResult res,int error) {}public void onGetTransitRouteResult(MKTransitRouteResult res,int error) {res.getPlan(0).getDistance();}public void onGetWalkingRouteResult(MKWalkingRouteResult res,int error) {}public void onGetAddrResult(MKAddrInfo res, int error) {}public void onGetBusDetailResult(MKBusLineResult result, int iError) {if (iError != 0 || result == null) {Toast.makeText(BuslineSearch.this, "抱歉,未找到结果",Toast.LENGTH_LONG).show();return;}// result.getBusRoute().get// result.getBusRoute().getStart().toString();CustomRouteOverLay routeOverlay = new CustomRouteOverLay(BuslineSearch.this, mMapView);routeOverlay.setData(result.getBusRoute());mMapView.getOverlays().clear();System.out.println(mMapView.getOverlays().size());mMapView.getOverlays().add(routeOverlay);mMapView.invalidate();mMapView.getController().animateTo(result.getBusRoute().getStart());}@Overridepublic void onGetSuggestionResult(MKSuggestionResult res, int arg1) {// TODO Auto-generated method stub}});// mLocationManager.requestLocationUpdates(listener);// 注册定位事件loc_listener = new LocationListener() {@Overridepublic void onLocationChanged(Location location) {if (location != null) {String strLog = String.format("您当前的位置:/r/n" + "纬度:%f/r/n"+ "经度:%f", location.getLongitude(),location.getLatitude());flag = true;Drawable marker = getResources().getDrawable(R.drawable.ic_launcher);final GeoPoint p = new GeoPoint((int) (location.getLatitude() * 1E6),(int) (location.getLongitude() * 1E6));CustomOverlayItem item = new CustomOverlayItem(marker,BuslineSearch.this, p, "我的位置", "", false);mMapView.getOverlays().add(item);mMapView.getController().animateTo(p);}}};// 设定搜索按钮的响应mBtnSearch = (Button) findViewById(R.id.search);OnClickListener clickListener = new OnClickListener() {public void onClick(View v) {SearchButtonProcess(v);}};mBtnSearch.setOnClickListener(clickListener);}void SearchButtonProcess(View v) {if (mBtnSearch.equals(v)) {mMapView.getOverlays().clear();mMapView.getOverlays().removeAll(mMapView.getOverlays());mMapView.invalidate();EditText editCity = (EditText) findViewById(R.id.city);EditText editSearchKey = (EditText) findViewById(R.id.searchkey);mCityName = editCity.getText().toString();mSearch.poiSearchInCity(mCityName, editSearchKey.getText().toString());}}@Overrideprotected void onPause() {if (null == app)app = (App) this.getApplication();app.mBMapMan.getLocationManager().removeUpdates(loc_listener);app.mBMapMan.stop();super.onPause();}@Overrideprotected void onResume() {if (null == app)app = (App) this.getApplication();app.mBMapMan.start();super.onResume();app.mBMapMan.getLocationManager().requestLocationUpdates(loc_listener);// 定位}@Overrideprotected boolean isRouteDisplayed() {// TODO Auto-generated method stubreturn false;}@Overrideprotected void onDestroy() {// TODO Auto-generated method stubsuper.onDestroy();}}以上代码内容是针对Android百度地图自定义公交路线导航的相关知识,希望对大家有所帮助。
(责任编辑:)

